
How to Install Sugi Ban (Shou Sugi Ban) Japanese Burnt Wood on Exterior Walls
by SlatSolution®
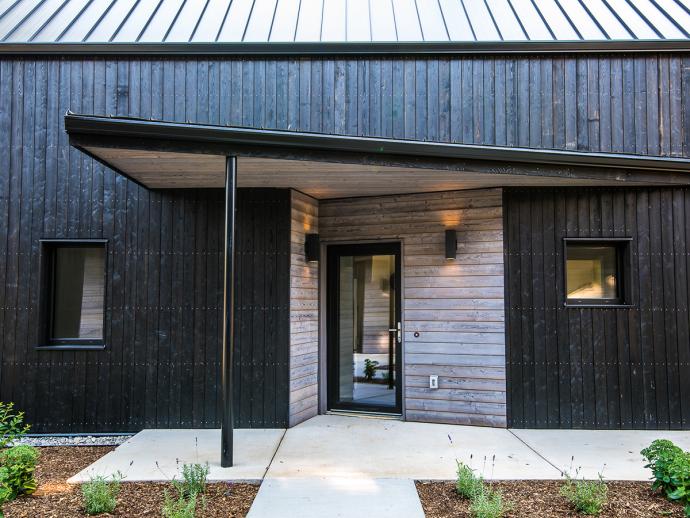
Sugi Ban, also known as Shou Sugi Ban, is a traditional Japanese technique that involves charring wood to preserve and enhance its natural character. The result? Strikingly beautiful, weather-resistant cladding that adds depth and texture to any exterior. At SlatSolution®, we offer premium pre-charred wood panels that bring this timeless technique into modern architectural design.
If you’re considering installing Sugi Ban siding on your next project, this step-by-step guide will walk you through the process—from preparation to final sealing—so you can get the most from this remarkable material.
🔧 What You’ll Need
Pre-charred Sugi Ban panels by SlatSolution®
House wrap (weather-resistant barrier)
Rainscreen system or furring strips
Stainless steel fasteners (screws or nails)
Saw with fine-tooth blade
Drill/driver & level
Measuring tape
Optional: breathable wood sealer for reapplication
Step-by-Step Installation Guide
1. Acclimate Your Siding
Before installation, allow the Sugi Ban panels to acclimate onsite for 5–7 days. Stack them flat with spacers in a shaded, dry, and ventilated space.
🔍 Tip from SlatSolution®: Our panels are kiln-dried after charring to reduce movement, but on-site acclimation ensures optimal performance.

2. Prepare the Wall
Install a weather-resistant barrier (WRB) over the wall sheathing. Then install a rainscreen system using furring strips (typically ¾" thick), spaced according to whether you’re doing a vertical or horizontal install.
🌬 Why rainscreens? Even though Sugi Ban is naturally rot- and insect-resistant, a rainscreen allows moisture to ventilate and escape—extending the lifespan of your siding.

3. Use the Right Fasteners
Always use stainless steel screws or nails to avoid rust streaks and chemical reactions with the charred surface. Hidden fasteners can be used for a clean, modern finish, while face-screwed options give a more rustic, authentic look.
⚠️ SlatSolution® recommends pre-drilling for face screws to avoid splitting and ensure cleaner installation.
4. Install the Siding
Start at the bottom and work upward, whether installing horizontally or vertically. Leave a 1/8" to 1/4" gap at end joints and around trim areas to allow for expansion.
Keep rows level
Stagger seams for a natural appearance
Maintain consistent reveals
Allow for a drip edge at the bottom
🪵 SlatSolution® Sugi Ban panels come pre-cut in flexible lengths to minimize waste and maximize design flexibility.
5. Apply Finish (If Required)
Sugi Ban siding from SlatSolution® is factory-sealed with natural oil. If your panels are unfinished or will face intense sun exposure, consider applying a UV-resistant penetrating oil or polyurethane to help preserve color.
Reapply finish every 2–5 years depending on sun exposure
Clean panels first with water and a soft brush
Always test on a small section before full application

Maintenance & Longevity Tips
Perform seasonal inspections
Clean with water and soft bristle brush (no pressure washing)
Reapply finish as needed for color retention
Touch up exposed cuts with matching char or sealer
Why Choose Sugi Ban by SlatSolution®?
🔥 Naturally fire- and pest-resistant due to the charring process
💧 Durable against moisture and rot, ideal for all-weather exteriors
🌿 Eco-friendly and sustainable, with minimal chemical treatment
Ready to Transform Your Exterior?
SlatSolution® Sugi Ban panels bring old-world craftsmanship into modern spaces with pre-charred, pre-finished boards designed for easy installation and long-term performance.
👉 [Browse Sugi Ban Options]
👉 [Contact SlatSolution® for Samples or Builder Pricing]