
Serenity in Slat: Acoustic Slatted Wood Wall Panels
Transform your living space into a tranquil haven with the elegance and functionality of acoustic slatted wood wall panels. These panels not only add aesthetic value but also enhance the acoustic quality of your room. In this comprehensive guide, we will explore the benefits of slatted wood wall panels, provide step-by-step installation instructions, and offer expert tips for achieving a professional finish. Plus, explore our stunning collection of wall panels on our website to find the perfect match for your home.
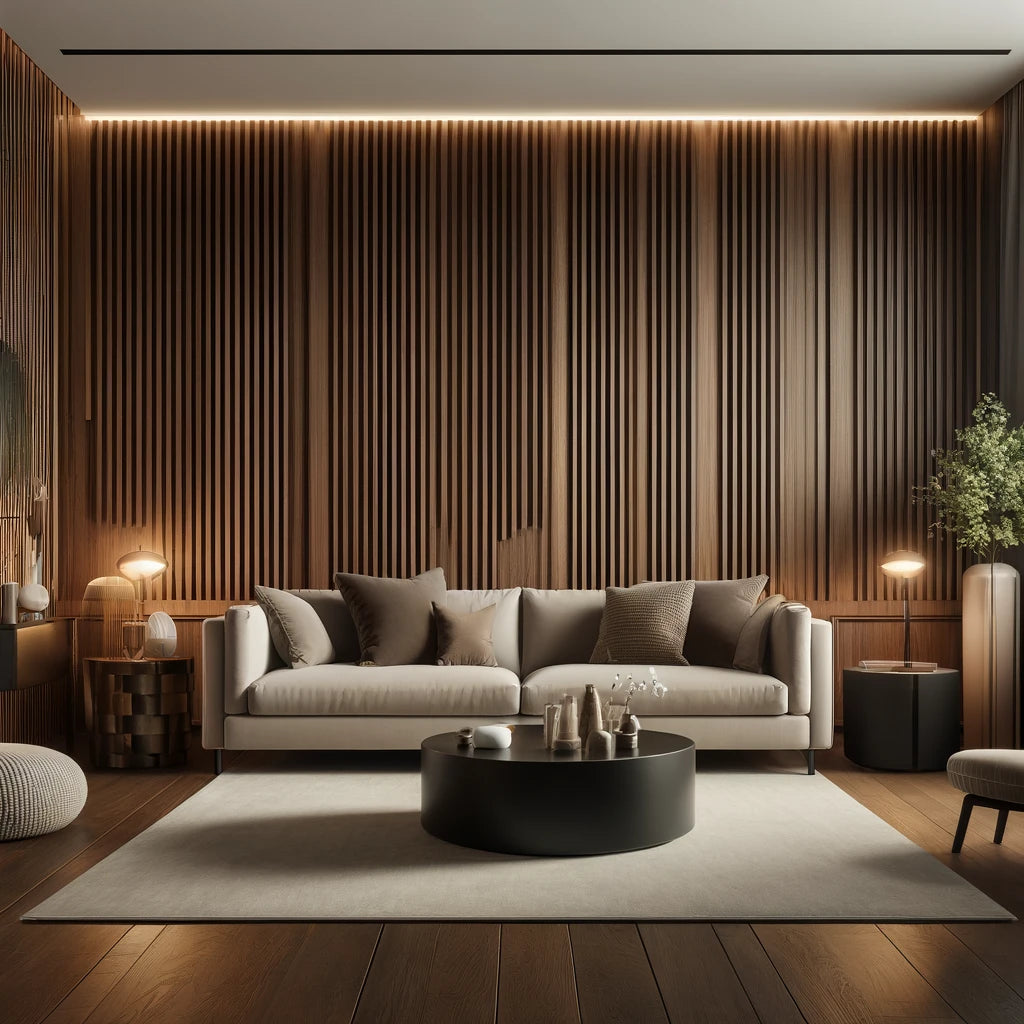
The Appeal of Slatted Wood Wall Panels
Aesthetic and Acoustic Benefits of Slatted Wood Wall Panels
Slatted wood wall panels bring a sophisticated and modern look to any interior. The natural wood grain and texture add warmth and character, while the slatted design offers a contemporary edge. Additionally, these panels are excellent for improving room acoustics. The slats help diffuse sound, reducing echo and creating a more serene and pleasant environment.
Durability and Practicality
Made from high-quality materials, slatted wood wall panels are durable and long-lasting. They resist wear and tear, making them a great investment for any home. These panels are also easy to clean and maintain, ensuring they stay looking beautiful with minimal effort.
Versatility in Design
Available in various finishes and wood types, slatted wood wall panels can be customized to suit any interior design style. Whether you prefer a natural oak finish, a sleek black stain, or a painted look, these panels can be tailored to match your decor perfectly.
Step-by-Step Guide to Installing Slatted Wood Wall Panels
Tools and Materials You'll Need
Before you start, gather the following tools and materials:
- Slatted wood wall panels
- Measuring tape
- Level
- Pencil
- Adhesive or nails
- Saw (if panels need cutting)
- Sandpaper
- Caulking gun
- Caulk
- Paint or wood finish (if needed)
- Safety gear (gloves, goggles)
Step 1: Prepare Your Walls
Cleaning and Smoothing the Surface
Begin by thoroughly cleaning your walls to remove any dust, dirt, or grease. Use sandpaper to smooth out any rough areas or imperfections. This preparation is crucial to ensure that the slatted wood wall panels adhere properly to the wall.
Measuring and Marking
Measure the dimensions of your wall and mark where each panel will go. Use a level to ensure your lines are straight. Accurate measurements and markings are essential for achieving a professional finish.
Step 2: Cutting the Panels
Measuring and Marking the Panels
Measure your slatted wood wall panels to fit the dimensions you marked on the wall. Mark the panels with a pencil where they need to be cut.
Cutting the Panels
Using a saw, carefully cut the panels to the required size. Wear safety gear during this step to protect yourself from dust and debris.
Step 3: Applying Adhesive
Choosing the Right Adhesive
Select an adhesive suitable for the type of slatted wood wall panels you are using. Some panels may require specific adhesives, so check the manufacturer's recommendations.
Applying the Adhesive
Apply the adhesive to the back of the wall panel in a zigzag pattern. Be generous but avoid applying too much adhesive, which can cause the panels to slip or not adhere properly.
Step 4: Installing the Panels
Placing the Panels on the Wall
Carefully press the panel onto the wall, starting from the bottom and working your way up. Use a level to ensure the panel is straight. Press firmly to ensure good adhesion.
Securing the Panels
Depending on the type of slatted wood wall panels and the adhesive used, you may need to secure the panels with nails or screws temporarily until the adhesive sets. Follow the manufacturer's instructions for the best results.
Step 5: Finishing Touches
Filling Gaps and Seams
Once all the panels are installed, check for any gaps or seams between them. Use caulk to fill these areas for a seamless look. Smooth the caulk with your finger or a caulking tool.
Finishing (If Needed)
If your slatted wood wall panels require a finish, consider applying a coat of paint or wood stain to enhance their appearance. Choose a finish that complements your room’s decor and protects the wood.
Final Inspection
After the panels are installed and any finish or caulk has dried, inspect your work. Ensure all panels are securely attached and that there are no visible gaps or imperfections.
Tips for a Professional Finish
Take Your Time
Rushing through the installation can lead to mistakes. Take your time to measure, cut, and apply each panel carefully to ensure a high-quality finish.
Use Quality Materials
Investing in high-quality slatted wood wall panels and adhesive will result in a more durable and attractive finish. Cheap materials may not adhere well and can deteriorate over time.
Seek Help If Needed
If you’re unsure about any part of the process, don’t hesitate to seek help from a professional or consult online resources. Proper guidance can make a significant difference in the final result.
Regular Maintenance
To keep your slatted wood wall panels looking their best, clean them regularly with a soft cloth and mild detergent. Avoid using harsh chemicals that can damage the surface.
Transform your home with the serene beauty and acoustic benefits of slatted wood wall panels. Follow our step-by-step guide to achieve a professional finish that adds value and tranquility to your living space. Ready to get started? Visit our website to explore our extensive collection of wall panels and find the perfect style to match your home decor.